Windows-> Arrange
To undo the arrangement, maximize button
Windows-> Hide
Windows-> Unhide
Sunday, March 1, 2009

Entering a Formula That Referencing Data from Multiple Workbooks
- =[Workbook Name]Sheet Reference!Cell Range
- To create a formula in one workbook to reference cell B21 on the Summary worksheet of the Sales.xls workbook
=[Sales.xls]Summary!B21
- If the workbook name or sheet name contains one or more spaces, enclose the entire workbook name and sheet name reference in single quotation marks.
='[US Sales.xls]Summary'!B21
- If one of the workbooks is in different folder,
='C:\My Documents\Domestic Sales\[US Sales.xls]Summary'!B21
Creating and Saving a Custom Workbook Template
- Remove the values and text that will changev each time you create a workbook using your customized template
- Be careful not to delete the formulas
- replace variable data values with zeros
- File-> Save As
- Save As Type-> Template


Copying information across worksheets
To copy the values and formats from the January worksheet across the worksheet group
Edit-> Fill-> Across Worksheets

Edit-> Fill-> Across Worksheets

Consolidating data from multiple worksheets using a 3-D reference
- = Worksheet Range!Cell Range
= SUM(Sheet1:Sheet4!B21)
This formula adds the values in cell B21 on the worksheets between Sheet 1 and Sheet 4
- To sum the amount of tuition paid for a year

Create cell references to other worksheets
To insert the cell reference to the January worksheet in the February worksheet


Entering a formula that references another worksheet
- To develop a formula that references cell D10 in the Sales worksheet
=Sales!D10
The exclamation point separates the sheet reference (Sales) from the cell reference (D10).
- If a worksheet name contains one or more spaces, enclose the sheet name in single quotation mark.
= 'Sales Data'!D10
To enclose the sheet name in single quotation marks
- To create a formula that adds total sales from two worksheets
=Domestic!B10 + International!B8
Grouping worksheets
To select an adjacent group, press and hold the Shift key

To select a non adjacent group, press and hold the Ctrl key


To select a non adjacent group, press and hold the Ctrl key

Wednesday, July 30, 2008
Setting Up a Workbook (Part Two)
Excel techniques used:
Insert or delete a cell
Move a group of cells to a new location
Zoom in or out on a worksheet
Zoom in or out to fill the program window
Change to another open workbook


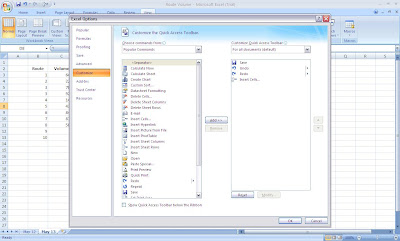
(Zoom in by clicking the pictures)
Insert or delete a cell
- Home/ cells/ insert/ insert cells
- Home/ cells/ delete/ delete cells
Move a group of cells to a new location
Zoom in or out on a worksheet
Zoom in or out to fill the program window
- View/ zoom/ zoom to selection
Change to another open workbook
- View/ window/ switch windows
- View/ window/ arrange all
- Customize quick access toolbar/ more commands


Setting Up a Workbook (Part One)
Excel techniques used:
Open, create, and save a workbook
Copy a worksheet to another workbook
Hide, unhide, and delete a worksheet
Change a row's height or column's width
Insert, delete, hide, or unhide a column or row


(Zoom in by clicking the pictures)
Open, create, and save a workbook
- Microsoft office button
- Quick access toolbar
- Microsoft office button/ prepare/ properties
- Microsoft office button/ prepare/ properties/ property views and options down arrow/ advanced properties/ custom
Copy a worksheet to another workbook
- Move or copy dialog box
Hide, unhide, and delete a worksheet
Change a row's height or column's width
Insert, delete, hide, or unhide a column or row


Monday, July 21, 2008
Working with Multiple Worksheets and Workbooks: Tracking Cash Flows (Part Two)
Excel techniques used:
Use data from multiple workbooks
Create and use an Excel workspace


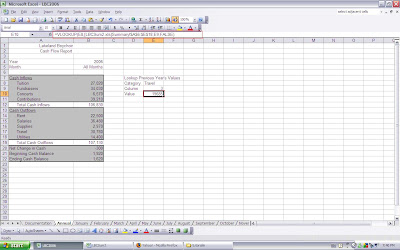

(Zoom in by clicking the pictures)
Use data from multiple workbooks
- Create a summary workbook
- View the list of linked workbooks
- Setup a lookup table and insert the VLOOKUP function
Create and use an Excel workspace


Subscribe to:
Posts (Atom)