Tools-> Customize-> Customize dialog box-> Options tab
Click " Reset menu and toolbar usage data"
This blog is a collection of the Excel files I created. I made screen shots of all the files. I tried to improve Excel skill and received the certificate of Microsoft Office Specialist Certification- Excel 2003 Expert in 2010.
Friday, September 4, 2009
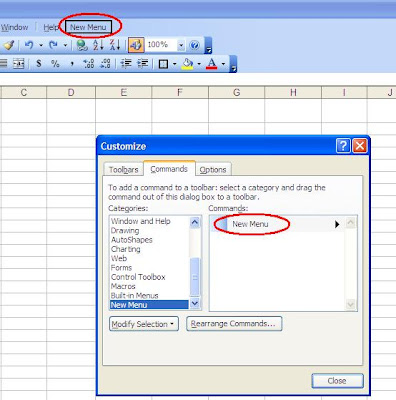
Create or delete a custom menu
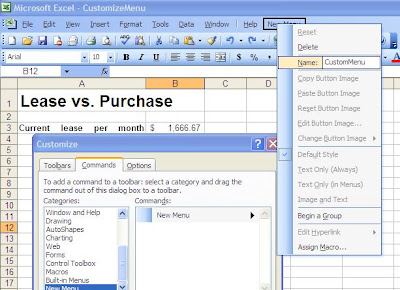
To create a custom menu:
Tools-> Customize-> Customize dialog box-> Commands tab
Categories list-> New Menu
Drag New Menu form the Commands list to the desired position on the menu bar
Right-click New Menu and then type name in the Name box
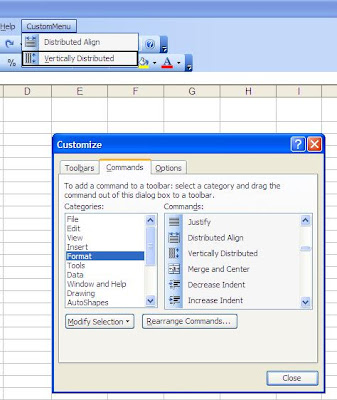
In the Commands list, click the command you want
Drag the command up to the menu bar and over the new menu
To delete a custom menu:
Tools-> Customize-> Customize dialog box
Right-click the custom menu-> Delete
Create a custom toolbar
Display, hide, or reset toolbar buttons
Friday, April 24, 2009
Tuesday, March 31, 2009
Validating data entry
Data validation enables you to define a set of rules that guide data entry for a specific range of cells.
Validation rule specifies
- Data types
- Acceptable values
- Input message
- Error-alert message
Thursday, March 12, 2009
Editing a Hyperlink
Right-click the cell with hyperlink-> select Edit Hyperlink-> click the "Screen Tip" button-> Set hyperlink screen tip dialog box
Wednesday, March 11, 2009
Turning on the AutoRepublish Feature
This feature republishes the Web page automatically whenever the workbook is saved.
Click the " AutoRepublish every time this workbook is saved" check box
Click the " Open published web page in browser" to have Excel launch your Web browser automatically
Click the " AutoRepublish every time this workbook is saved" check box
Click the " Open published web page in browser" to have Excel launch your Web browser automatically
Selecting Elements to Publish
After clicking publish button on Save As dialog box -> Publish as Web Page dialog box
Item to publish-> Choose
To specify a filename for the HTML file: click "Browse" button-> Publish As dialog box
Item to publish-> Choose
To specify a filename for the HTML file: click "Browse" button-> Publish As dialog box
Saving a Workbook as a Web Page
- File-> Save as Web Page OR File-> Save as-> Save as Type: Web Page
- Click the "Add interactivity " check box to create an interactive Web page. Leave the check box unselected to create a noninteractive page.
- To specify the page title: click the "Change Title" button
Converting Excel Workbooks into Web Pages
Excel allows you to create two types of Web pages:
- Noninteractive Web page
- Interactive Web page: any changes users make on the Web page does not affect the original workbook, nor do changes last from one browser session to another
Tuesday, March 10, 2009
Merging Two Workbooks
Requirements must be met:
- The two workbooks must be copies of the same file, which must be a shared workbook.
- The two workbooks must have different filenames.
- The two workbooks must either have the same passwords or not be password-protected.
- The Track Changes feature must be turned on for both workbooks from the time the copy is first made.
- The tracking history must be kept from the time the copy is first made.
- Open the workbook into which you want to merge the files
- Tools-> Compare and Merge Workbooks
Monday, March 9, 2009
Tracking Changes to Cells
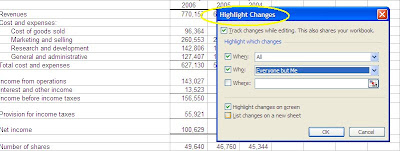
To highlight the changes:
Tools-> Track Changes-> Highlight Changes
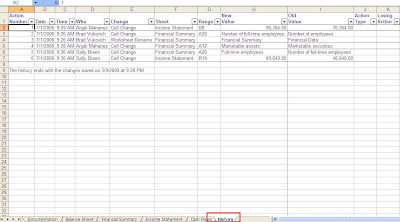
To show the contents of the tracking log:
Tools-> Track Changes-> Highlight Changes
To show the contents of the tracking log:
- Tools-> Track Changes-> Highlight Changes
- Click the " List changes on a new sheet" check box
- A new worksheet " History" appear
Resolving Conflcts
A Conflict occurs when users try to save different changes to the same cell.
The last user to save the document sees the Resolve Conflicts dialog box.
Rejected changes are stored in a tracking log to allow users to go back and retrieve wrongly rejected changes.
The last user to save the document sees the Resolve Conflicts dialog box.
Rejected changes are stored in a tracking log to allow users to go back and retrieve wrongly rejected changes.
Creating a Shared Workbook
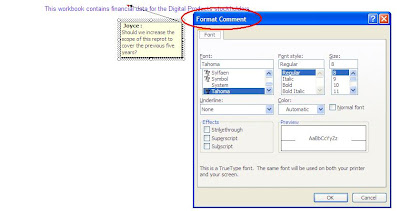
Formating the Comment Box
- Double-click the selection border
- Right-click the comment box and click Format Comment
- Format-> Comment
Hiding and Redisplaying the Comment
- Right-click the cell and click Hide Comment
- Hover the pointer over the cell with small red triangle in the upper-right corner
- Right-click the cell and click Show/Hide Comments
Sunday, March 8, 2009
Evaluating a Complex Formula
Using the Watch Window
Locating Suspect Formulas
Tracing Errors
Tracing Dependent Cells
Tracing Precedent Cells
Auditing Formulas
To display the formula auditing toolbar:
Tools-> Formula Auditing-> Show Formula Auditing Toolbar
Thursday, March 5, 2009
Using Lookup Functions to Create Currency Conversion Woksheets
The minimum administrative fee is $4, which is shown in yellow by using IF function and conditional formatting.
Tuesday, March 3, 2009
Creating an Excel Workspace
Using Lookup Function
VLOOKUP function is used for lookup tables in which the compare values are placed in the table's first column.
HOOKUP function is used when the compare values are placed in the table's first row.
Three pieces information needed to carry out the VLOOKUP funcion
HOOKUP function is used when the compare values are placed in the table's first row.
Three pieces information needed to carry out the VLOOKUP funcion
- The entry you want it to look up
- The range of the lookup table
- The number of the column in the lookup table containing the value you want to look up
Sunday, March 1, 2009
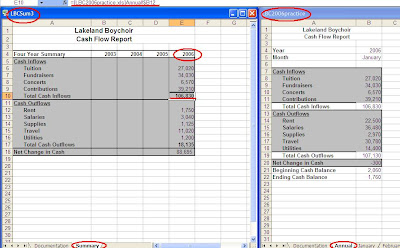
Create the Summary Workbook
To link the LBCSum3 workbook to the LBC2006practice workbook
To enter the remaining values
- E6 on the summary sheet in LBCSum3 workbook
- Switch to LBC2006practice workbook, double-click B8 in the annual worksheet
- Absolute reference-> mixed reference because fill the rest of the values using fill handle
To enter the remaining values
- Copy the formulas from column E and paste to the remaining columns
- Use Find and Replace feature to update workbook reference in each column
Creating the Workbook Reference
Subscribe to:
Posts (Atom)